
You want a fence contractor that fits your budget, style, and long-term needs without costly surprises. Hiring a qualified fencing contractor saves you time and ensures the job meets local codes, lasts longer, and avoids common installation mistakes.
This guide Fencing Contractors walks you through choosing the right pro, what to expect during the project, and how costs break down so you can plan confidently. Expect practical tips on vetting contractors, understanding timelines and permits, and comparing quotes to get the best value for your investment.
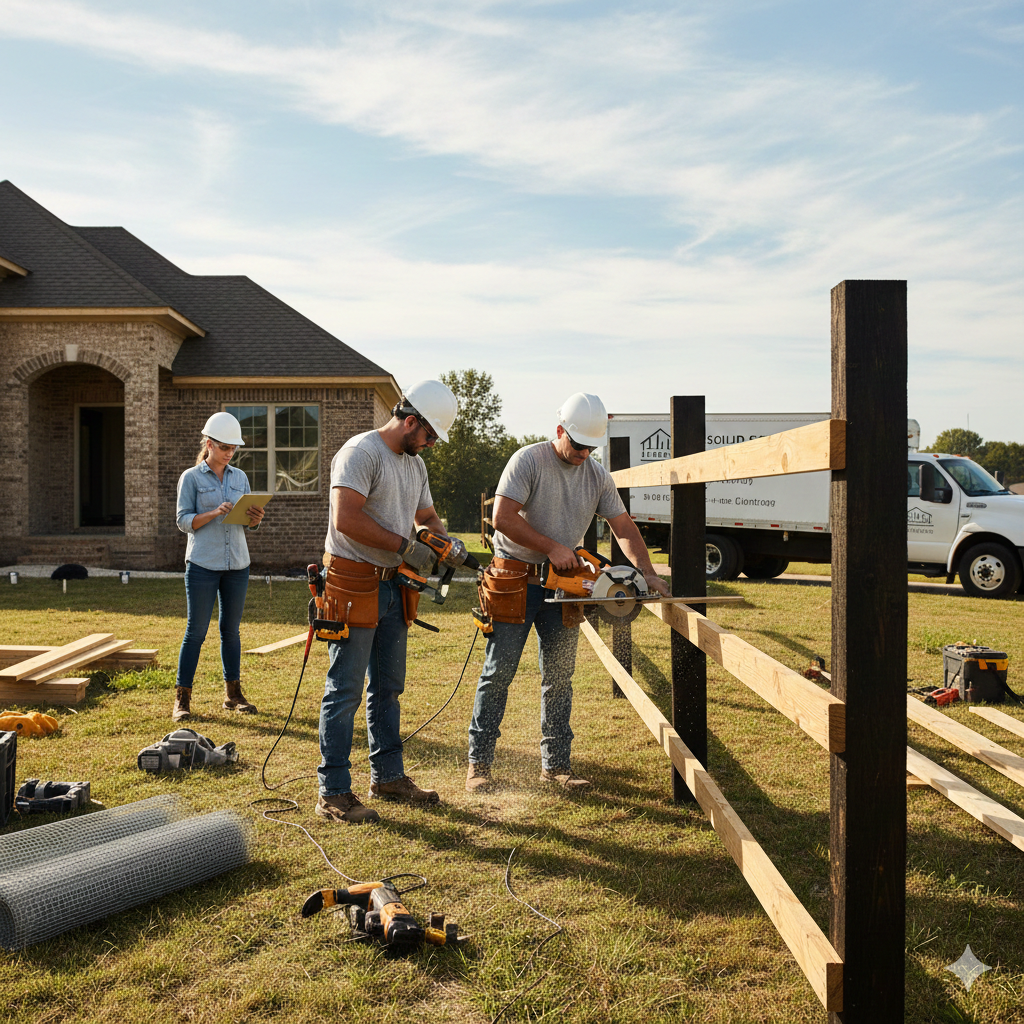
Choosing Professional Fence Installation
Hiring professionals protects your investment, ensures compliance with local rules, and reduces rework. Expect clearer timelines, accurate material estimates, and fewer unexpected costs when you work with an experienced crew.
Key Benefits of Hiring Experts
You get licensed tradespeople who know local building codes and permit processes, reducing the risk of fines or having to rebuild sections. Professionals also set posts to proper depth and use recommended concrete mixes and fasteners, which improves fence longevity.
Experienced contractors provide accurate material takeoffs and schedules, so you avoid overbuying or waiting weeks for missing parts. They also have specialized tools—post-hole augers, hydraulic drivers, and compaction equipment—that save time and produce straighter, more consistent runs.
Warranty and insurance matter. A professional installer typically offers workmanship warranties and carries liability insurance and workers’ comp. That protects you from damage claims and gives recourse if installation defects appear.
Factors to Consider When Selecting a Service
Check credentials first: verify business license, trade certifications, and insurance limits. Ask for three recent references with comparable projects and inspect their finished work or photos for quality of posts, alignment, and hardware choice.
Compare written estimates that list materials, labor hours, site prep, permit handling, and cleanup. Beware of vague or unusually low bids; they often exclude critical items like gravel for post holes or gate hardware.
Confirm timelines and payment terms before signing. A reasonable schedule includes site inspection, utility location, permit processing, and a clear completion date. Keep a written contract that specifies warranty length and what it covers.
Common Types of Residential and Commercial Fencing
Residential choices focus on privacy, curb appeal, and pet containment. Popular options include wood picket or privacy panels, vinyl for low maintenance, and aluminum for ornamental look without rust—each with distinct cost and maintenance profiles.
Commercial needs emphasize security and durability. Chain-link with privacy slats suits perimeter control, while galvanized steel or welded mesh provides higher resistance to tampering. For high-security sites, consider anti-climb designs, taller heights, and access-control integration.
Mixed-use options include composite materials for a balance of appearance and longevity, and precast concrete or masonry for noise reduction and extreme durability. Match material choice to site conditions—soil type, drainage, and exposure—to avoid premature failure.
Project Workflow and Costs
You’ll want a clear sequence from site inspection to final invoice, and a realistic budget that covers materials, labor, permits, and contingencies. Expect decisions about materials, gate placement, and site prep to drive both timeline and cost.
Site Assessment and Planning
A contractor will perform a site visit to measure linear footage, locate utilities, and assess terrain. You should provide property lines or a survey; without one, expect added time and potential boundary disputes.
Note drainage, slopes, tree roots, and existing structures that affect post spacing and material choice. Rocky soil or steep grades typically add labor and specialized hardware such as longer posts, concrete footings, or custom brackets.
Ask for a written scope that lists materials (type, grade, finish), post spacing, gate style, and permit responsibilities. Verify who handles tree trimming, waste removal, and locating utilities—these items often appear as separate line items on estimates.
Timeline and Installation Process
Installation typically follows these stages: final measurements and material ordering, utility marking and site prep, post setting, panel or picket installation, gate hang and hardware, finish work and cleanup. You should get a projected start date and phase durations in writing.
Weather, permit delays, and material lead times can shift the schedule. Expect 1–3 days for small residential jobs and 1–2 weeks for larger or complex sites, excluding curing time for concrete footings.
Require milestone communication: a daily or weekly update protocol, change-order approval steps, and a contact person for on-site decisions. This reduces downtime and keeps costs controlled.
Pricing Structures and Budget Tips
Common pricing methods include per-linear-foot, itemized takeoff, or time-and-materials. Request an itemized estimate that breaks out materials, labor hours, machinery, permits, and disposal fees so you can compare bids accurately.
Watch for these frequent cost drivers: fence material (wood vs. vinyl vs. metal), post depth and concrete volume, site grading, gate complexity, and local permit fees. Allocate a contingency of 10–15% for hidden issues like rot or unmarked utilities.
Negotiate payment terms: a modest deposit, progress payments tied to milestones, and a final holdback until punch-list completion. Ask for warranties on materials and workmanship and get them in writing to protect your investment.

